RPG: Random Pixels Generator is an NFT collection that I’m building, it’s licensed under CC0 which means that “No Rights Reserved” so anyone can do whatever they want with the images since whoever owns the token doesn’t own any special rights to the image’s usage. At the moment you can follow this Twitter thread to see all spoiled images.
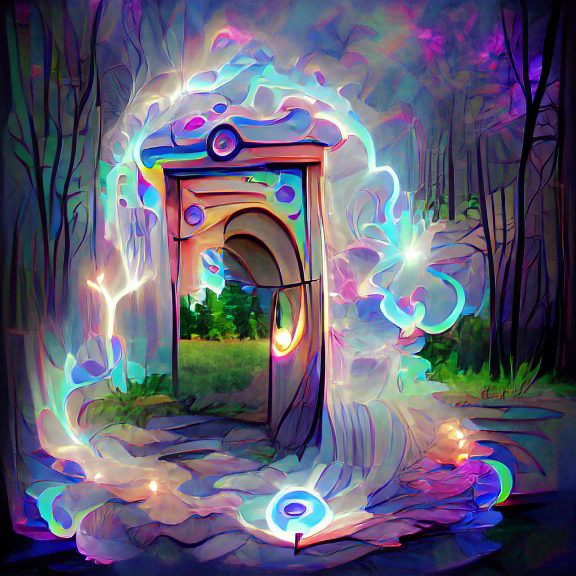
Random Pixels Generator ****is inspired by MMORPG and Sci-Fi worlds, and the process of generating each part of this universe is fun and chaotic. This article will register how I generate the images for the collection, so you can do it too and make your own AI visual things! Let’s hop in the magic portal of open source AI tooling then:
The library we’ll use is called Pixray:
Pixray Github repository: https://github.com/pixray/pixray
Pixray documentation: https://dazhizhong.gitbook.io/pixray-docs/
The first thing that it’s important for commercial usage is checking the license of the project. If we check Pixray LICENSE we’ll see that different AI drawers have different licenses. For the RPG collection, I chose the VQGAN+Clip drawer which is licensed under MIT, so we are good to go!
The process of generating images with this library works like this:
Setup the AI engine configurations, the most important are:
Initial image (can be either a .jpg or the engine itself can generate random noise)
Final image size
A word or a phrase
Maximum engine iterations
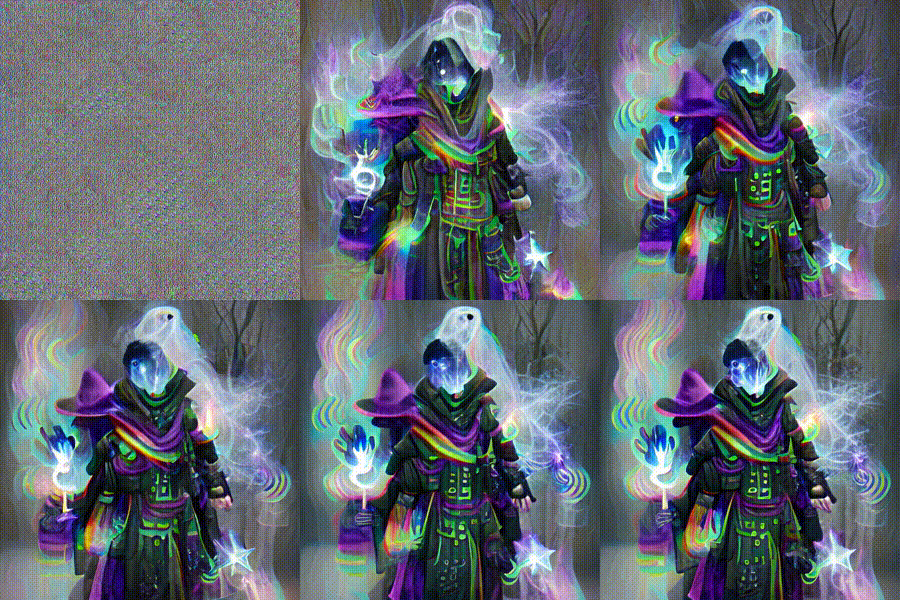
The AI engine will start with an initial image and every iteration it will attempt to transform the image into a word or phrase. The AI model was trained with a google images database in order to achieve that. When it’s done you’ll be able to save the final image as well as every iteration frame: here is what 420 frames looks like over 15 seconds:
Let’s get to practice then and do it yourself. First, the bad news: if you are gonna use the same method as I do, which uses Google Colab, you are gonna have to pay at least 10 U$ monthly to have access to their cloud servers since in all my attempts to run it with the free version it didn’t work.
If you know your way around things you can host a Google Colab local runtime which eliminates the above cost. I personally couldn’t set it up on my Windows PC, but it’s possible with WSL (Windows Subsystem for Linux).
I will first explore the Pixray default examples to then present you with the script I use for RPG. Unfortunately, the latest version examples are all broken here, so I’ll use the example that was available when I first tried the tool, it works perfectly! Here is the link for the example:
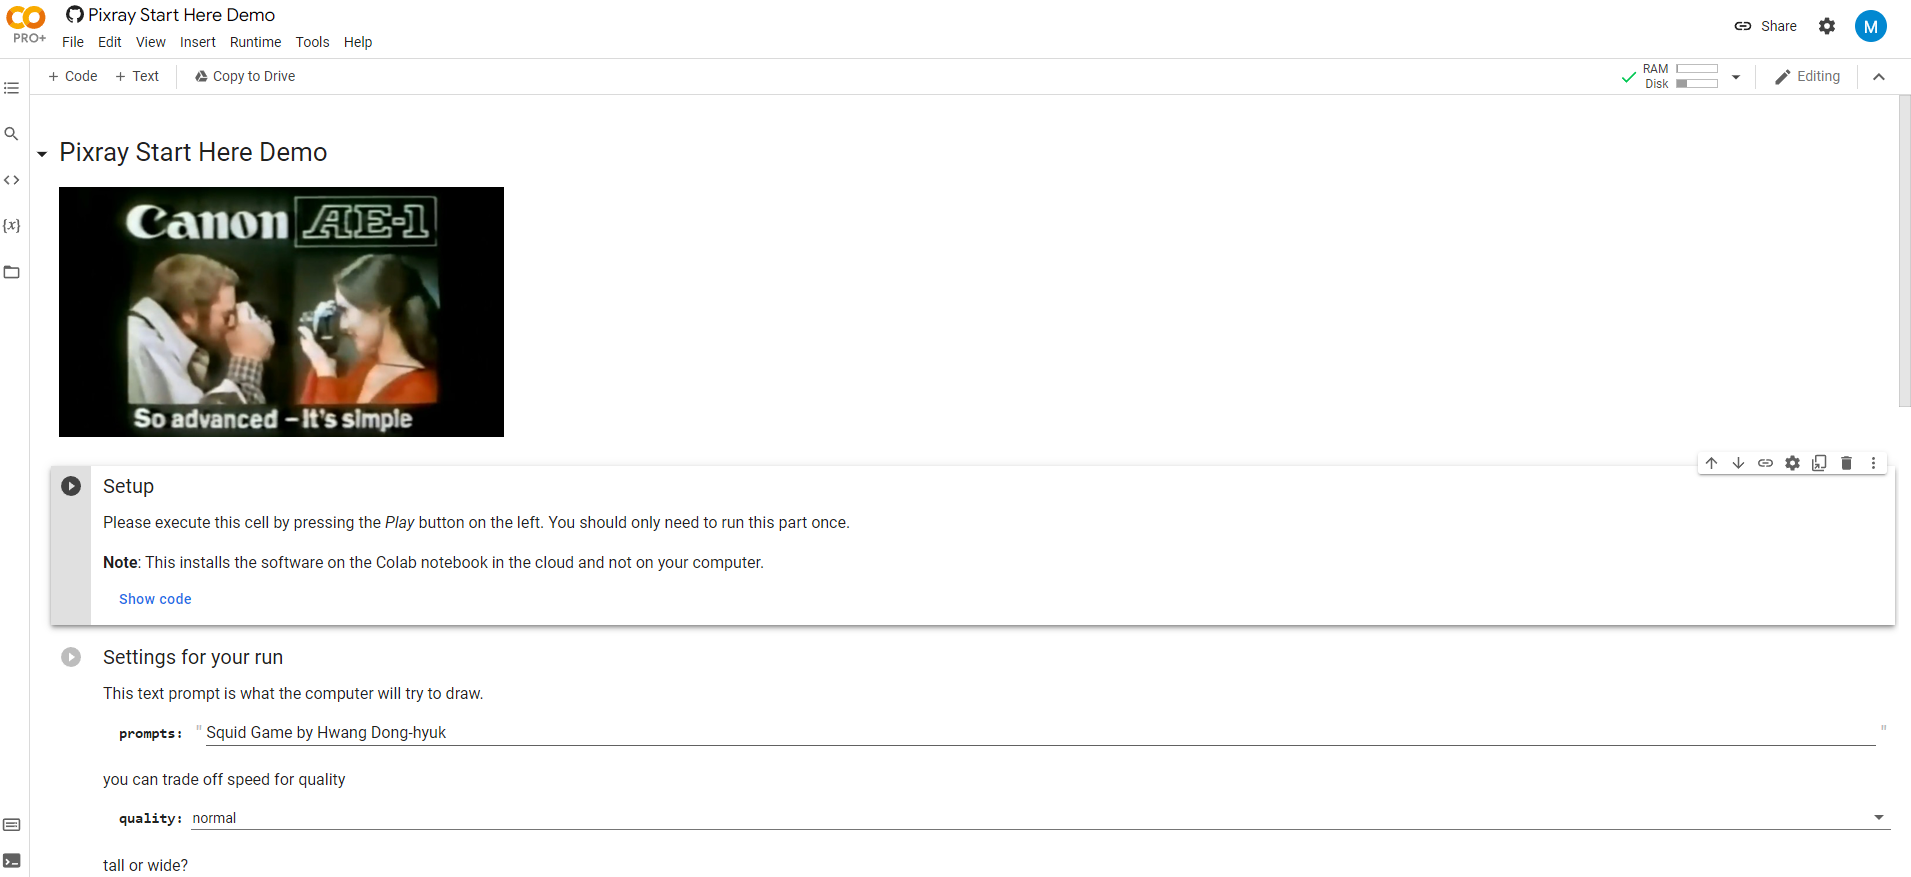
The way that Colab works is that you have blocks of code that you can run separately, but they affect a global scope and folders that you can access in the left menu. In order to run the AI engine, we must first execute the block of code that setups and installs Pixray on a new and temporary machine that will be used for your session.
Go ahead and run the setup block clicking in the “run” button:

It will take a couple of minutes to download and install all dependencies.
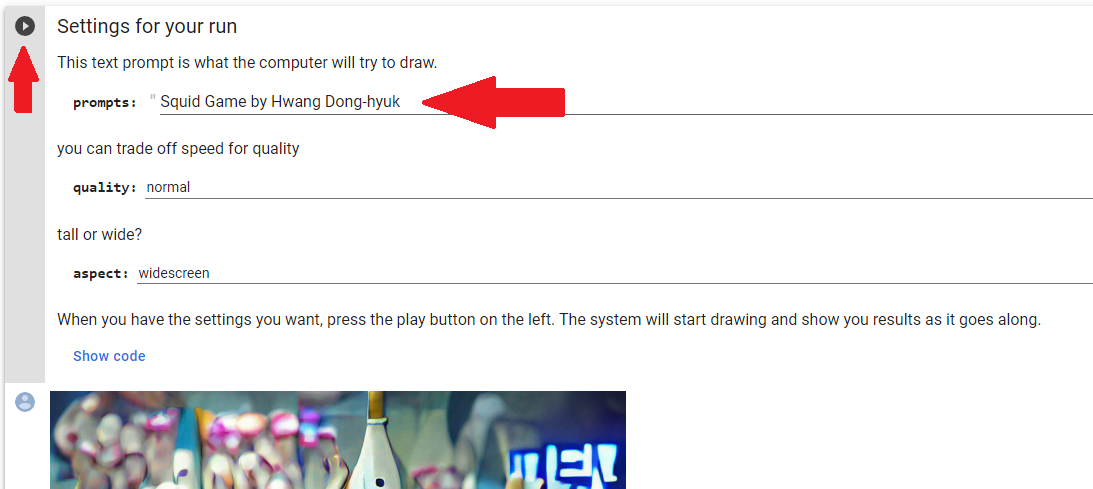
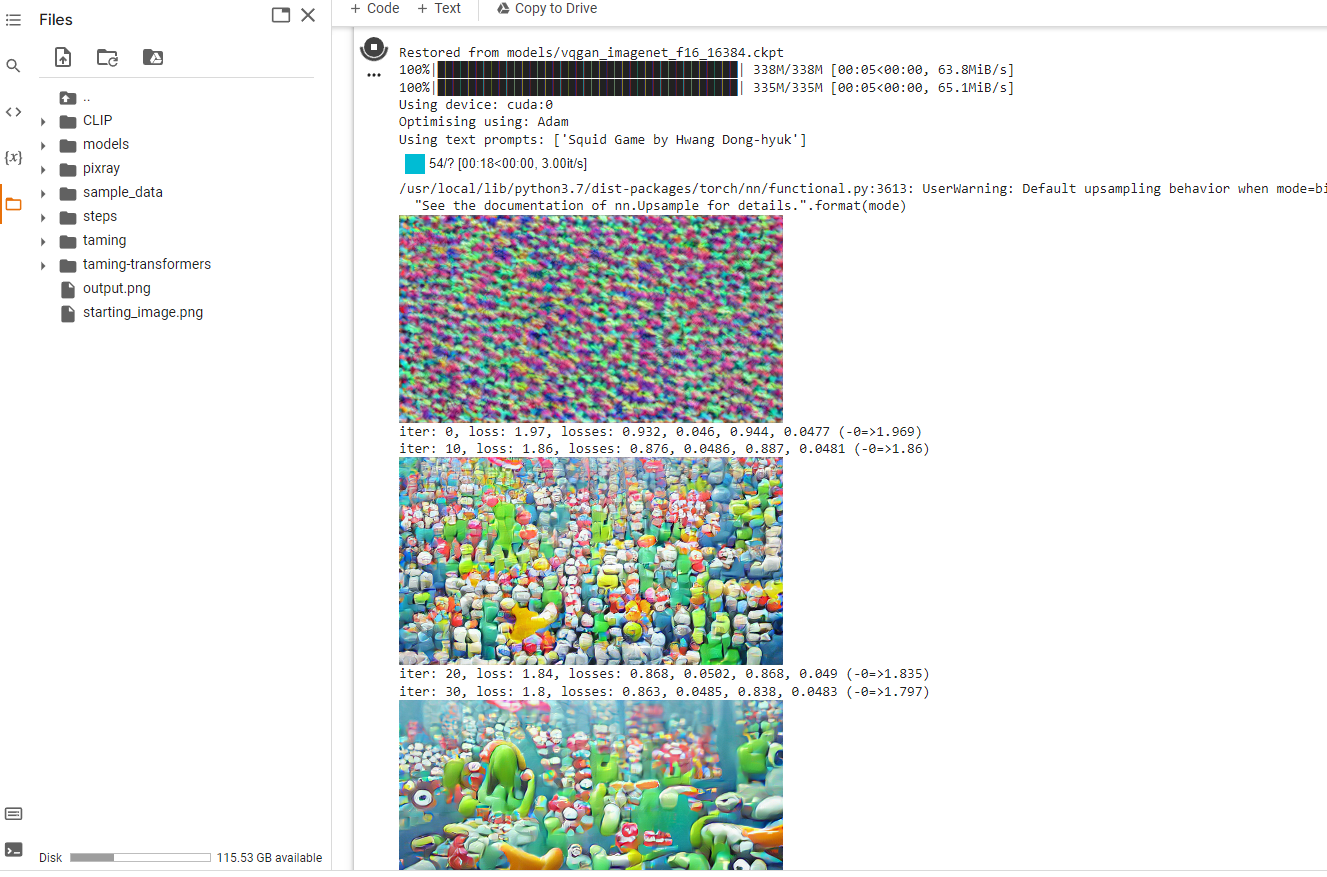
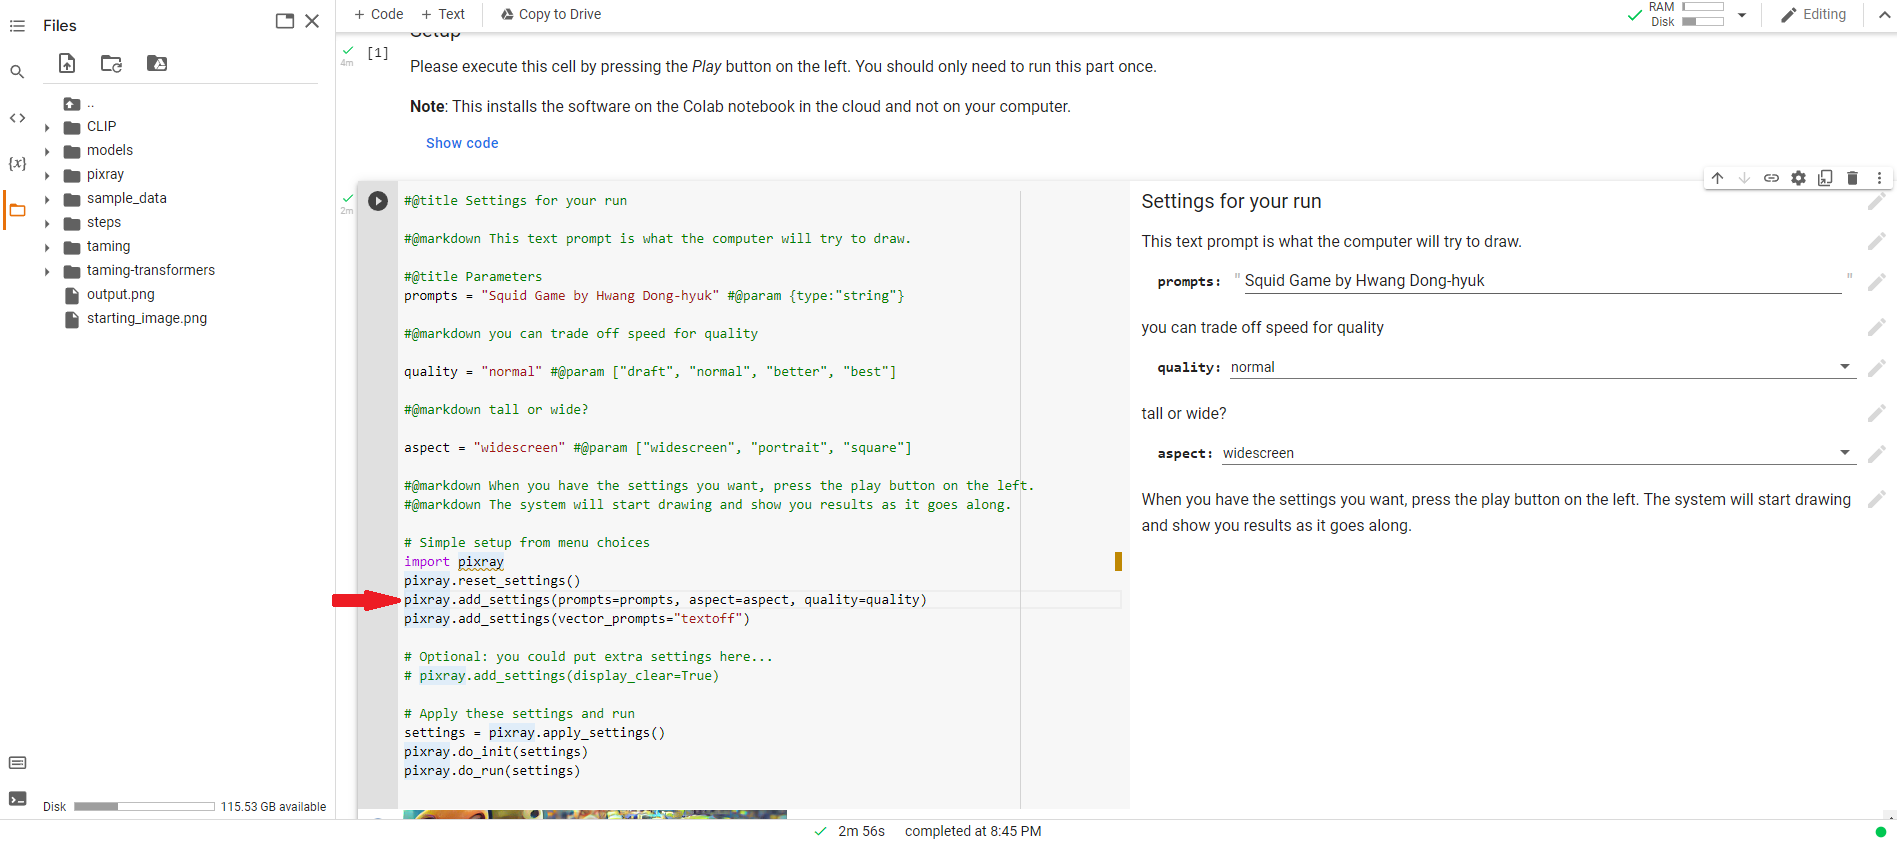
After that’s done you can start generating images! To run the initial example, scroll down to the second block of code, change “prompts” to the phrase you want to see the AI drawing! Press the “run” button for the second block of code and it will start the process:
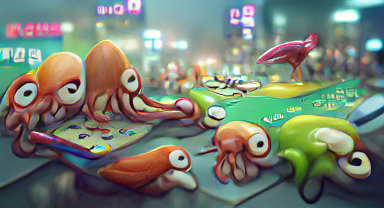
You’ll see the iterations get started and going below the code! Let it finish and compare it to the one that I just generated here in this example:
Here is an example of a matrix of prompts and what image is generated when you sum the column + row phrases:

You can click “Show Code” in the second block to see the code and add more engine parameters that you find in the Pixray documentation:
Now that I showed you the basics, let’s move to the Colab that I tweaked in order to produce the RPG collection. I tried exposing as many useful parameters as possible, and also added a way to input prompt matrixes so you can make compositions like the one I showed previously with 16 images.
Here is the link to my AI playground, fork it and have fun:
To setup and run you do the same as in the other example, just run the Setup code block and you’ll be able to run the generation code block:
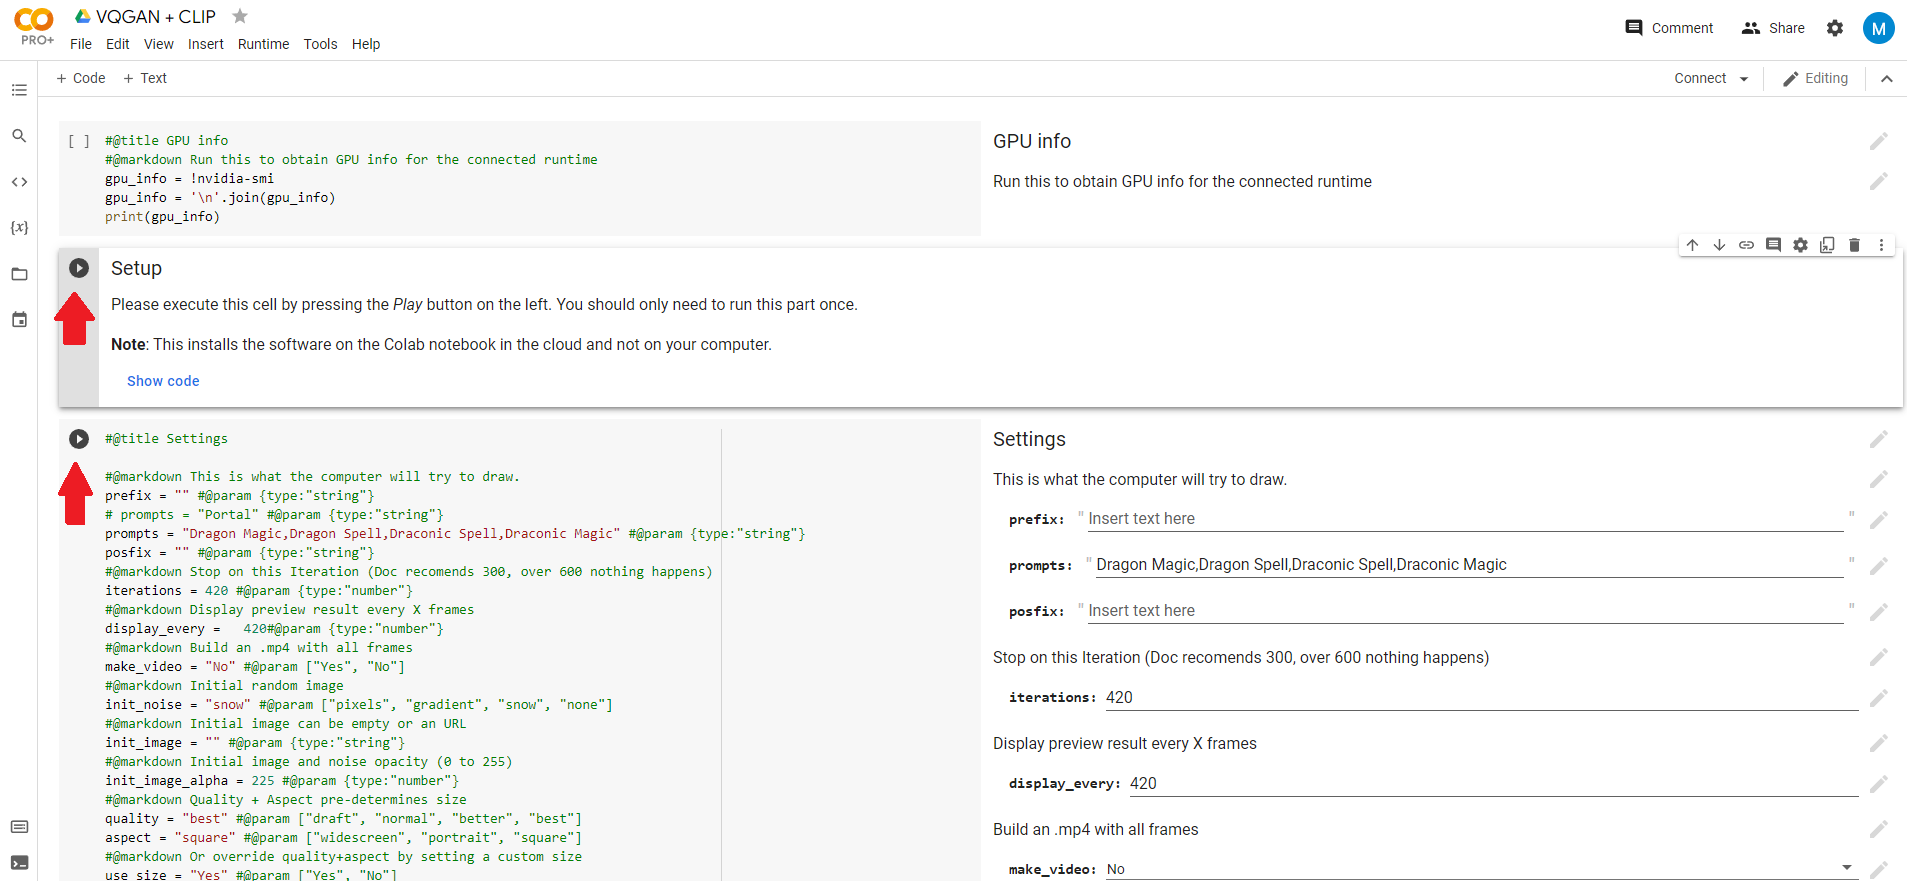
I’d like to show you how to use the prompts:

“prompts” work like in the first example, but there is a special property here: if you separate phrases by comma you will instruct the AI to generate 2 separate images. this way you can queue a lot of phrases and the AI generate them all, you find all .pngs with the same name as the prompt used in the folders where you previously found “output.png”
and if you do this:

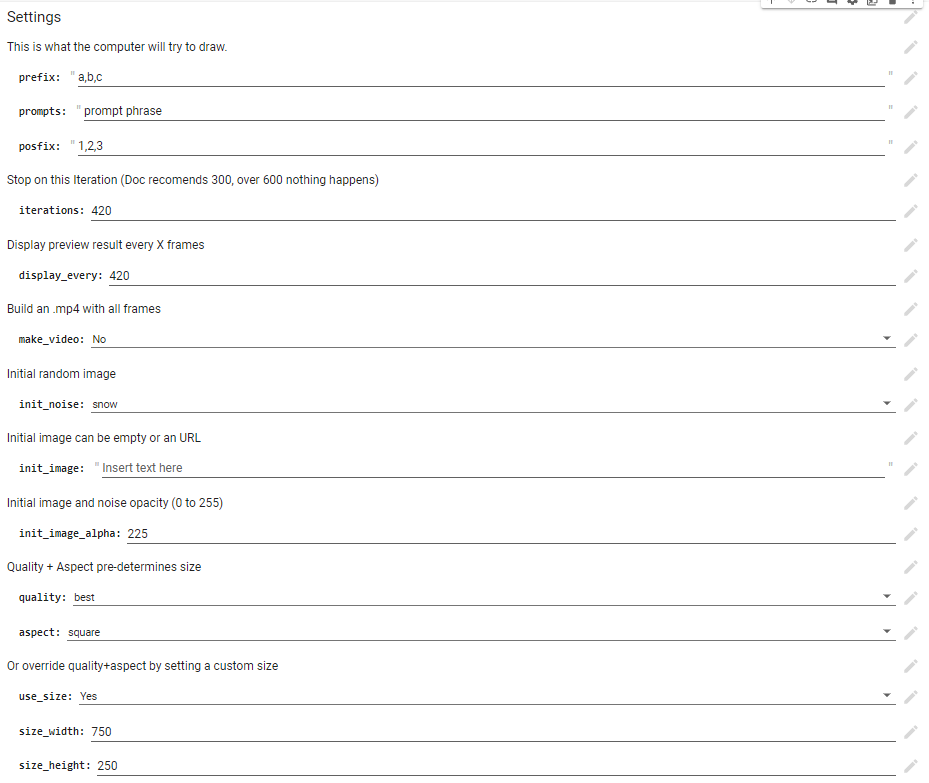
You will have EXACTLY the same prompts as the first example. So I opened space for you to multiply prompts 3 times, I rarely use both prefix and posfix at the same time, I normally use just one, they have the same effect one is just before and the other is after. If you use both like this:

you would generate all these images:
- a prompt phrase 1.png
- b prompt phrase 1.png
- c prompt phrase 1.png
- a prompt phrase 2.png
- b prompt phrase 2.png
- c prompt phrase 2.png
- a prompt phrase 3.png
- b prompt phrase 3.png
- c prompt phrase 3.png
So you can see how you can quickly scale the queue size with only a few inputs by using commas and the pre/posfixes.
I think all other properties are documented in the file itself, I recommend you fiddle around a lot with them and also with the code, there are no limits to what you can explore here!
If you enjoyed this guide or the RPG collection follow me at Twitter to keep updated on the collection release! I always like to share what I learn when exploring crypto and I often write about it, so I hope we see each other again!

